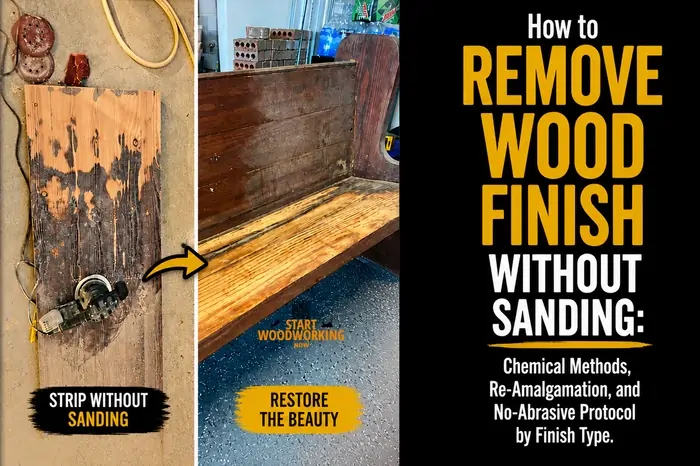
How to Remove Wood Finish Without Sanding: Chemical Methods, Re-Amalgamation, and No-Abrasive Protocol by Finish Type
Removing wood finish without sanding depends on one critical factor: the type of finish. Some finishes, like shellac and lacquer, can be dissolved and repaired with solvents, while others, like polyurethane, require chemical stripping rather than abrasion. In many cases, sanding is not only unnecessary but can damage thin veneer, carved details, or historically valuable surfaces.
The correct method depends on the finish chemistry, the condition of the surface, and whether the goal is repair, full removal, or recoating.
How Do You Remove Wood Finish Without Sanding?
- First, check whether removal is actually needed. Wipe mineral spirits on a hidden area. If the surface looks good under mineral spirits, the finish is sound — a single wipe-on recoat of the same finish type is all that is needed. No removal, no sanding.
- Shellac or lacquer — re-amalgamate for repairs or wipe-strip for full removal. For damaged shellac or lacquer, apply the appropriate solvent (denatured alcohol for shellac, lacquer thinner for lacquer) to re-flow the finish to a smooth surface. For full removal, use multiple solvent wipe passes with 0000 steel wool. No gel stripper or scraping required.
- Lacquer or shellac — furniture refinisher method. Apply furniture refinisher onto a 0000 steel wool pad and rub in circular motions. The refinisher dissolves the old finish, which is then carried away on the pad. Replace the pad frequently and wipe clean with a dry cloth.
- Polyurethane or varnish — gel stripper, plastic scraper, synthetic abrasive pad. Use a chemical gel stripper (NMP or benzyl alcohol) for 45–90 minutes under plastic film. Remove with a plastic scraper and use a Scotch-Brite pad for residue. Full protocol here →
- For recoating without full removal — liquid deglosser. Apply liquid sander-deglosser with a cloth and allow 10–15 minutes before wiping clean. This chemically etches the surface to create mechanical adhesion for the new coat, replacing the need for inter-coat sanding.
→ Identify your finish first: How to Identify Wood Finish — Sequential Solvent Tests
→ For polyurethane specifically: How to Remove Polyurethane Without Sanding
→ After removal: How to Refinish Wood After Stripping
→ Hub: How to Remove Wood Finishes — Complete Guide
This guide covers the five scenarios where sanding must be avoided, the re-amalgamation technique for lacquer and shellac, the furniture refinisher wash method, chemical deglossing for recoating, the complete no-sanding protocol by finish type, and lead paint safety requirements that make sanding illegal for consumer use on affected pieces.
When Is Sanding Not an Option? The 5 Mandatory No-Sand Scenarios
What Is Re-Amalgamation and When Does It Replace Full Removal?
What Is Re-Amalgamation?
Re-amalgamation is the most important technique in furniture restoration that no DIY guide explains adequately. It applies exclusively to thermoplastic finishes — shellac and nitrocellulose/CAB-acrylic lacquer — which are finishes that re-dissolve in their own solvents. When an old lacquer or shellac finish is crazed, dull, checked, or shows alligatoring, the finish has not structurally failed — it has simply dried and contracted over time. Re-amalgamation reverses this by re-introducing the same solvent that was used to apply the finish, which re-flows the existing film back into a smooth, level surface.
The visual result of re-amalgamation on a crazed lacquer is often indistinguishable from stripping and recoating — without the time, chemical exposure, sanding, or risk of the full removal process. The finish is not removed; it is repaired in place.
The original surface patina, colour, and character are fully preserved — which is why professional furniture conservators and antique restorers use re-amalgamation as the primary intervention for old lacquer and shellac before considering any removal.
Re-amalgamation does not work on:
Polyurethane (cross-linked thermoset — does not re-dissolve in any common solvent). Catalyzed lacquer (cross-linked — same reason). Water-based finishes (dried by coalescence, not evaporation — solvent does not re-flow). Alkyd varnish (partially cross-linked — very limited response). Oil finishes (penetrating, not film-forming). If re-amalgamation produces no visible effect on a test area, the finish is not a thermoplastic and full removal is required.
HOW TO Re-amalgamate shellac
Use fresh denatured alcohol. Pour a small amount on a clean, lint-free cotton cloth. Apply to the surface in long, even strokes following the grain. The shellac immediately softens and re-flows under the cloth. Work systematically across the surface, maintaining a wet edge.
Allow the first pass to flash off (30–60 seconds), then make a second smooth pass in the same direction to level any streaks. For severely crazed shellac: apply a slightly heavier coat and work in circular motions first, then finish with grain-direction strokes. Allow 30 minutes minimum before assessing the final result — wet re-amalgamated shellac appears glossier and may show streaks that level completely as it dries.
HOW TO Re-amalgamate lacquer
Use lacquer thinner (not acetone — acetone evaporates too fast for controlled re-amalgamation). Apply with a clean cloth in long strokes. Lacquer thinner is significantly more aggressive than denatured alcohol — work in smaller sections (30 cm at a time) and complete each section before moving to the next.
Overly wet application or working too slowly causes the existing lacquer to dissolve completely rather than re-flow, leaving bare areas. The correct technique is a moderately damp cloth moved quickly and smoothly. For complete surface re-amalgamation: three passes — first in grain direction, second perpendicular (allows levelling), third in grain direction for final smooth alignment.
📝In one restoration project, I worked on a 1940s shellac-finished cabinet with widespread surface crazing and dullness but no wood exposure. Instead of stripping, I applied denatured alcohol in controlled passes to re-amalgamate the finish, which re-flowed the existing shellac into a uniform film within minutes. The result restored gloss and continuity while preserving the original patina, reducing the total restoration time from multiple days to under one hour.
No-Sand Removal Protocol by Finish Type
When Should You Use Liquid Deglosser Instead of Removing the Finish?
Liquid deglosser — sold as “liquid sandpaper,” “liquid sander-deglosser,” or “deglossing solution” — is the correct tool when the existing finish is sound and the goal is recoating rather than removal. It is completely absent from most furniture refinishing guides but is widely used in professional cabinet painting and furniture restoration when stripping and sanding would be unnecessarily destructive.
The mechanism: liquid deglosser contains a combination of mild solvents and surfactants that chemically etch the surface of the existing finish at a microscopic level — creating tiny surface irregularities that provide mechanical adhesion for the new coat.
This is the same adhesion improvement that sanding between coats achieves, but achieved by chemistry rather than abrasion. The finish itself remains fully intact and bonded to the wood; only the outermost surface chemistry changes.
When liquid deglosser is the correct choice
Sound finish that needs a new topcoat (same or compatible finish type). Veneered furniture where inter-coat sanding carries sand-through risk. Carved or detailed surfaces where uniform sanding is impossible. Any surface where preserving the existing stain colour and patina is the priority — liquid deglosser does not remove stain or alter wood colour. Antiques where adding a protective topcoat is desired without disturbing the original finish.
When liquid deglosser is not the correct choice
When the goal is colour change through staining — the existing finish film blocks stain penetration regardless of deglossing. When the finish is peeling, crazed, or structurally failed — chemical etching of a failing finish does not repair the adhesion failure. When a completely fresh bare-wood starting point is required for the new finish.
Liquid deglosser vs. sanding between coats — which is better for veneer?
For veneered furniture requiring multiple topcoats, liquid deglosser between coats is significantly safer than 320-grit inter-coat sanding. With 320-grit sanding on thin veneer, each coat’s sanding pass removes a small amount of material — over 3–4 coats, the cumulative abrasion approaches the veneer thickness limit.
Liquid deglosser between coats adds zero abrasion while providing equivalent adhesion. Apply after each coat has cured (24 hours minimum for oil-based, 4–8 hours for water-based), allow 15 minutes contact, wipe clean, and apply the next coat within 2 hours.
📝I worked on a veneered walnut side table with a thin lacquer finish that had become uneven and lightly scratched but was still intact. Sanding was not an option due to the veneer thickness, so I used a furniture refinisher with 0000 synthetic pad to dissolve and even out the existing finish without cutting into the wood. The surface levelled out consistently, and after a light recoat, the result was fully acceptable for the client with no loss of veneer or detail.
What Are the Key Specifications for Removing Wood Finish Without Sanding?
| Entity / Method | Attribute | Value and Detail |
|---|---|---|
| Mineral spirits diagnostic test | Whether removal is needed at all | Apply mineral spirits to hidden area with cloth. If finish looks good under saturation — no crazing, even colour, no lifting — the finish is sound. Apply a single wipe-on recoat of the same finish type. No removal, no sanding. This eliminates the need for all subsequent steps on approximately 30–40% of pieces described as “needing refinishing.” |
| Re-amalgamation — shellac | Mechanism, when appropriate, and method | Shellac is thermoplastic — re-dissolves in denatured alcohol. Applying fresh denatured alcohol to old shellac re-flows the existing film into a new smooth surface. Appropriate for: crazed or dull shellac, minor water damage, aged shellac with loss of sheen. Not appropriate: deeply damaged shellac with wood exposure, or when colour change is desired. Method: apply denatured alcohol with a cloth in long smooth strokes, allow to flash off, repeat until surface is smooth. No scraping, no sanding, no new finish required. |
| Re-amalgamation — lacquer | Mechanism, when appropriate, and method | Nitrocellulose and CAB-acrylic lacquer re-dissolves in lacquer thinner. Same principle as shellac re-amalgamation. Appropriate for: crazed, checked, or blushed lacquer on furniture and cabinets. Method: lacquer thinner applied with cloth in smooth passes. Lacquer re-flows and levels. Small crazed areas can be re-amalgamated without affecting surrounding finish. Full surface: 3–5 passes with cloth. Works particularly well on fine furniture with detailed profiles where any abrasion would be destructive. |
| Furniture refinisher (Minwax Furniture Refinisher) | Composition and mechanism | A blend of lacquer thinner and other solvents with a slightly slower evaporation rate than pure lacquer thinner. Applied with 0000 steel wool, it dissolves lacquer and shellac through friction — the finish dissolves as you work and is carried away by the steel wool pad and wiping cloths. Replaces both stripper and scraping for lacquer and shellac removal. Not effective on polyurethane or oil-based varnish — those require gel stripper. |
| Furniture refinisher — process | Application method and pad replacement frequency | Pour refinisher onto 0000 steel wool pad. Work small sections (20×20 cm) in circular and then grain-direction strokes. The pad becomes loaded with dissolved finish within 2–3 minutes — replace immediately when the pad starts re-depositing dark residue rather than picking up finish. Typically 4–6 pads per dining chair seat; more for large surfaces. Follow with dry cloth wipe between sections. No scraping required at any stage. |
| Liquid deglosser (Wilbond, Klean-Strip) | Mechanism and use case | Contains surfactants and mild solvents that chemically etch the finish surface at a microscopic level — creating adhesion without removing the finish film. Applied with cloth, 10–15 minutes contact, wiped clean. Surface is ready for new coat within 30–60 minutes. Use case: applying new topcoat over existing sound finish without full stripping. Effective on polyurethane, lacquer, varnish. Not appropriate when colour change through stain is the goal — stain cannot penetrate through existing film. |
| Gel stripper without sanding — scraper and pad technique | How to achieve bare wood without sandpaper | After gel stripper dwell under plastic film, the finish lifts completely from the wood surface if dwell time is adequate. Scrape with plastic scraper (never metal on veneer). For residual film: Scotch-Brite grey pad (320-grit equivalent) in grain direction with a small amount of fresh stripper on the pad — the mechanical action of the synthetic pad plus the solvent dissolves the remaining film. Scotch-Brite is not sandpaper — it creates no directional scratches and does not remove wood fibres. |
| Steel wool 0000 without sandpaper | When appropriate and species restrictions | 0000 steel wool with solvent (furniture refinisher, lacquer thinner, or denatured alcohol) provides a non-directional light abrasion that removes dissolved finish residue. Not appropriate on oak, walnut, mahogany, cherry, or any tannin-rich species — iron particles from steel wool contaminate open grain and cause dark iron-tannate staining under the new finish. Use Scotch-Brite white (extra-fine synthetic pad) on tannin-rich species in all applications. |
| Heat gun without sanding | Appropriate scenarios and technique | Heat gun at 200–230°C softens film-forming finishes for mechanical removal without solvents. Appropriate for: solid hardwood flat surfaces, exterior furniture with peeling paint, multi-coat paint on architectural woodwork. Not appropriate: veneer (heat loosens veneer adhesive), shellac or lacquer (fire risk from flammable vapours), or any surface near glass or plastic. Move continuously — never hold stationary. Scrape immediately while finish is warm with metal scraper (solid wood) or plastic (veneer-adjacent areas). |
Frequently Asked Questions About Removing Wood Finish Without Sanding
Can you remove polyurethane from wood without sanding?
Yes — benzyl alcohol gel stripper (for veneer and antiques) or NMP gel stripper (solid wood only) under plastic film for 45–90 minutes, followed by a plastic scraper and Scotch-Brite pad for residue. No sandpaper is required at any point. The gel stripper does the dissolution work that sanding would do mechanically. After removal, the water drop test confirms bare, clean wood — ready for finishing without any sanding if the stripper residue has been fully neutralised and the surface is smooth. Sanding after stripping is only needed if the grain has been raised by the stripper or if surface imperfections need levelling. Full protocol in the dedicated polyurethane without sanding guide.
What is re-amalgamation and which finishes can be re-amalgamated?
Re-amalgamation is the re-flowing of an existing finish using its own solvent — not removing the finish but repairing it in place by dissolving and re-levelling the existing film. It applies only to thermoplastic finishes that re-dissolve in solvent: shellac (denatured alcohol), nitrocellulose lacquer (lacquer thinner), and CAB-acrylic lacquer (lacquer thinner). Polyurethane, catalyzed lacquer, conversion varnish, and water-based finishes cannot be re-amalgamated — they are cross-linked and do not re-dissolve. Re-amalgamation is the preferred first intervention for crazed, dull, or lightly damaged shellac and lacquer finishes before any removal is attempted.
Is it safe to use a heat gun to remove finish from veneered furniture?
No — heat guns are not safe on veneered furniture for two reasons. First, the heat penetrates through the thin veneer layer and softens the adhesive that bonds the veneer to the substrate — causing veneer to lift, blister, or delaminate. Second, on old furniture where the veneer adhesive is hide glue or older water-based PVA, the heat causes the glue to fail rapidly and the veneer separates from the substrate. Use chemical gel stripper (solvent-based benzyl alcohol, not water-based) for veneered furniture. Heat guns are appropriate on solid hardwood flat surfaces only.
Summary: Key Values for Removing Wood Finish Without Sanding
Sanding is mandatory only for polyurethane and alkyd varnish on solid hardwood flat surfaces where speed is the priority — and even these can be stripped without sanding using gel stripper. For all other scenarios: shellac and lacquer are removed or repaired by solvent wipe or re-amalgamation, both requiring zero abrasion.
Furniture refinisher dissolves both by friction, eliminating scraping and sanding entirely. Wax is removed by mineral spirits wipe alone. For recoating without removal: liquid deglosser etches adhesion chemically — correct for veneered furniture, carved profiles, and antiques where any abrasion carries risk.
Five scenarios require no-sand approach absolutely: veneer (sand-through risk), carved profiles (physical impossibility of uniform sanding), lead paint (regulatory and health), antiques (conservation), and between-coat adhesion preparation (recoating, not removal).
Re-amalgamation is the most time-saving technique — available for shellac and lacquer, repairs the finish without any removal or sanding by re-flowing the existing film with its own solvent.
→ Identify your finish: How to Identify Wood Finish
→ Polyurethane specifically: Remove Polyurethane Without Sanding
→ Stripper selection: How to Choose a Chemical Stripper
→ Hub: How to Remove Wood Finishes — Complete Guide